
In the world of scroll-driven animations, finding fresh ways to present content while maintaining readability is an ongoing challenge. Today, we’ll build an interactive dual-column text animation that creates a mesmerizing wave effect as users scroll, with a synchronized image that adapts to the content in focus
Our animation features:
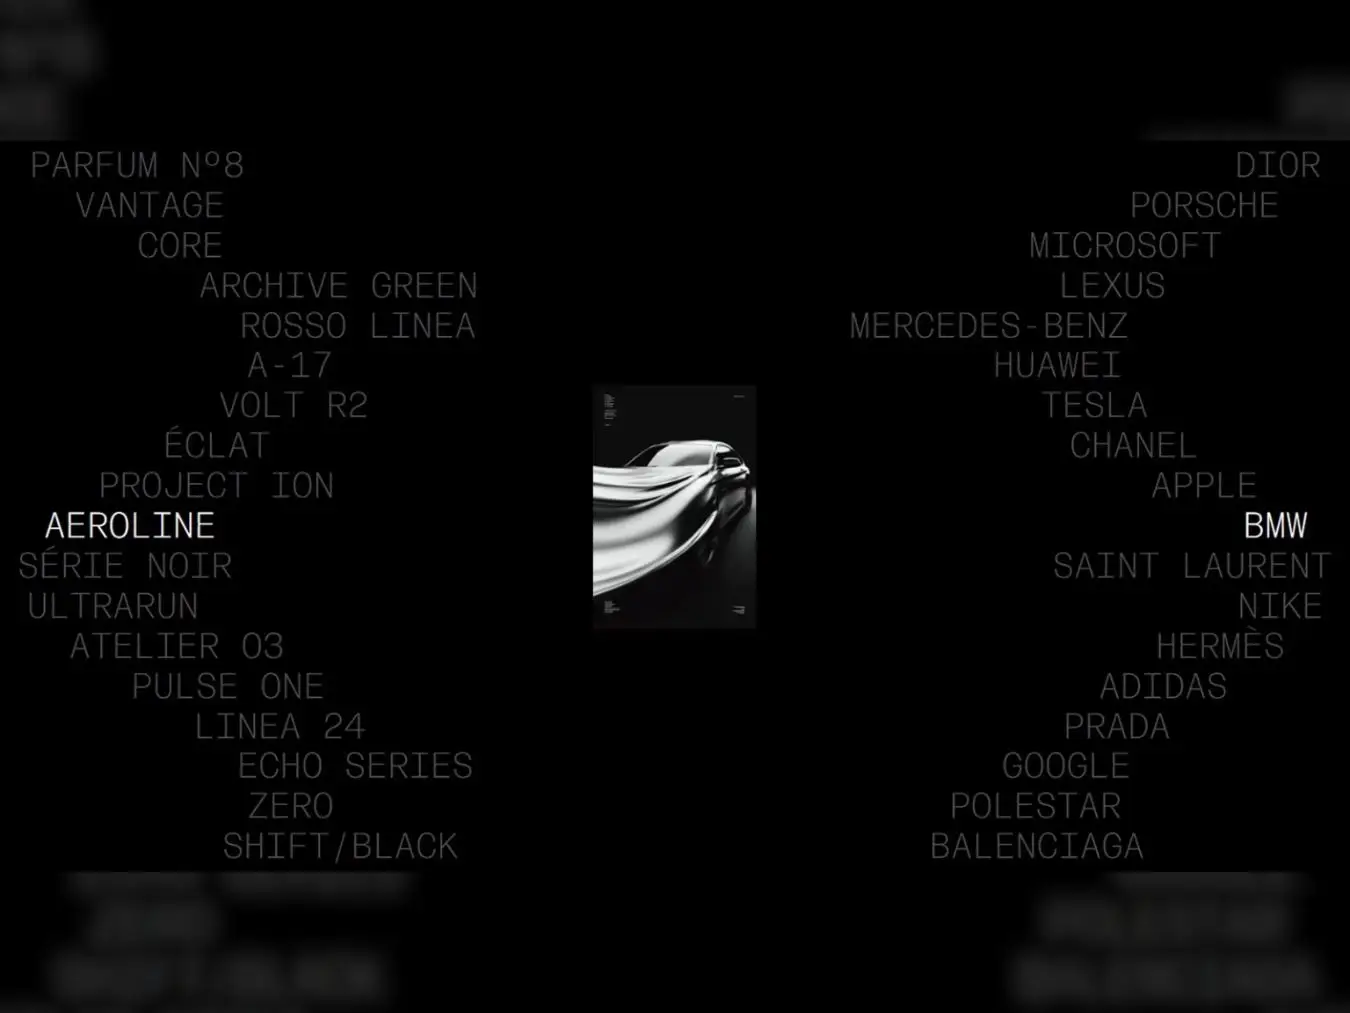
- Two columns of text moving in opposite wave patterns
- Smooth, physics-based transitions using GSAP’s
quickTo - A centered image that updates based on the focused text
- Fully configurable wave parameters (speed, frequency)
- Responsive behavior that adapts to different screen sizes
We’ll build with Vite and power our animations with GSAP (ScrollTrigger and ScrollSmoother).

Learn modern web animation using GSAP 3 with 34 hands-on video lessons and practical projects — perfect for all skill levels.
The Concept
This animation idea came to me after recreating an animation from the 15th Anniversary Plus Ex site. I really loved the feeling and sensitivity the text had when scrolling through the page, it intrigued me quite a bit. After some more idea iterations, the concept of this dual wave animation came to life as a way to present a list of elements differently.
Setting Up the HTML Structure
Let’s start with the markup. Our structure needs ScrollSmoother wrappers, two columns, a centered image container, and data attributes for configuration.
To achieve a result similar to the demo, I recommend using a substantial number of elements. While you’re free to adapt this tutorial for smaller lists, keep in mind you’ll need to adjust the CSS accordingly to maintain a visually pleasing result.
        Volt R2

        Éclat

        Project Ion

        AeroLine

        Série Noir

        UltraRun

        Atelier 03

        Pulse One

        Linea 24


          Echo Series


        Zero


          Shift/Black


        Solar Drift

        Nº 27

        Mode/3

        Pure Form


        Tesla
        Chanel
        Apple
        BMW
        Saint Laurent
        Nike
        Hermès
        Adidas
        Prada
        Google
        Polestar
        Balenciaga
        Audi
        Valentino
        Samsung
        Bottega Veneta

Key structural decisions:
smooth-wrapper&smooth-content: Required for ScrollSmoother to work—wraps all scrollable content.spacer: Creates vertical scroll distance, allowing the animation to play over extended scrollingdata-wave-number: Controls wave frequency (how many wave cycles occur across all elements)data-wave-speed: Controls animation speed during scrolldata-image: Only on left column elements—centralizes image source management- Separate columns: Allows independent wave direction control
The HTML is intentionally simple. All the magic happens in JavaScript, keeping markup clean and maintainable.
Styling the Foundation
Our CSS establishes the visual layout and sets up smooth transitions for the focused state. We start with the ScrollSmoother structure.
/* Spacer creates vertical scroll distance */
.spacer {
  height: 75svh; /* Adjust based on desired scroll length */
}

/* Main animation wrapper */
.dual-wave-wrapper {
  display: flex;
  width: 100%;
  position: relative;
  gap: 25vw; /* Creates breathing room for the center image */
}

.wave-column {
  flex: 1;
  display: flex;
  flex-direction: column;
  gap: 1.25rem;
  font-size: clamp(2rem, 10vw, 3rem);
  font-weight: 400;
  line-height: 0.7;
  position: relative;
  z-index: 100; /* Ensures text stays above image */
}

.wave-column-left {
  align-items: flex-start;
}

.wave-column-right {
  align-items: flex-end;
}

.animated-text {
  width: max-content;
  color: #4d4d4d;
  text-transform: uppercase;
  transition: color 300ms ease-out;
}

.animated-text.focused {
  color: white;
  z-index: 2;
}
Why these choices?
- Flexbox layout: Provides equal column widths while maintaining flexibility
clamp()for font-size: Creates responsive typography without media queries for the base sizemax-contentwidth: Prevents text from wrapping, keeping the wave effect clean- CSS transition on color: Complements GSAP’s position animations with state changes
Centering the Image
The image thumbnail needs special positioning to stay centered between columns:
.image-thumbnail-wrapper {
  position: absolute;
  top: 0;
  left: 50%;
  transform: translate(-50%, 0);
  width: 15vw;
  height: auto;
  z-index: 1; /* Below text, above background */
  pointer-events: none;
  display: grid;
  place-items: center;
}

.image-thumbnail {
  width: auto;
  height: auto;
  max-width: 100%;
  max-height: 30vh;
}
Design considerations:
pointer-events: none: Image won’t interfere with scroll interactions- Viewport-relative sizing: 15vw ensures consistent scaling across screens
- Max-height constraint: Prevents oversized images on short viewports
Responsive Adjustments
@media (max-width: 1023px) {
  .dual-wave-wrapper {
    gap: 10vw;
  }

  .wave-column {
    gap: 2.5rem;
    font-size: 5vw;
  }

  .image-thumbnail-wrapper {
    width: 50vw;
  }
}
On smaller screens, we tighten the gap and increase the image size proportionally to maintain visual balance.
Setting Up Smooth Scrolling
Before diving into the animation class, we need to set up smooth scrolling. This is essential for creating fluid scroll-driven animations. Without it, the wave effect will feel jerky and disconnected.
Don’t forget to install GSAP using your preferred package manager or via the GSAP CDN, depending on your setup.
npm install gsap
or
Configuring ScrollSmoother
In your main.js file, initialize ScrollSmoother before creating any animations:
// mains.js
import gsap from 'gsap';
import { ScrollTrigger } from 'gsap/ScrollTrigger';
import { ScrollSmoother } from 'gsap/ScrollSmoother';

// Register GSAP plugins
gsap.registerPlugin(ScrollTrigger, ScrollSmoother);

// Create smooth scroll instance
ScrollSmoother.create({
  smooth: 1.5,      // Smoothing intensity
  normalizeScroll: true, // Normalize scroll behavior across browsers
});
Why these settings?
smooth: 1.5: Provides a balanced smoothing effect, not too slow, not too immediatenormalizeScroll: true: Ensures consistent scroll behavior across all browsers and devices
Alternative: Using Lenis
If you prefer or your project already uses Lenis for smooth scrolling, you can use it instead of ScrollSmoother:
// main.js
import Lenis from "lenis";

const lenis = new Lenis({
  duration: 1.5,
});

// Synchronize Lenis scrolling with GSAP's ScrollTrigger plugin
lenis.on("scroll", ScrollTrigger.update);

// Add Lenis's requestAnimationFrame (raf) method to GSAP's ticker
// This ensures Lenis's smooth scroll animation updates on each GSAP tick
gsap.ticker.add((time) => {
  lenis.raf(time * 1000); // Convert time from seconds to milliseconds
});

// Disable lag smoothing in GSAP to prevent any delay in scroll animations
gsap.ticker.lagSmoothing(0);
Both libraries work seamlessly with GSAP’s ScrollTrigger. Choose the option that best fits your project.
Building the Animation Class
Now for the interesting part: the JavaScript that brings everything to life. We’ll build this progressively, starting with the class constructor and initialization.
Class Setup and Configuration
import gsap from 'gsap';
import { ScrollTrigger } from 'gsap/ScrollTrigger';

export class DualWaveAnimation {
  constructor(wrapper, options = {}) {
    this.wrapper = wrapper instanceof Element
      ? wrapper
      : document.querySelector(wrapper);

    // Read configuration from data attributes
    const waveNumber = this.wrapper?.dataset.waveNumber
      ? parseFloat(this.wrapper.dataset.waveNumber)
      : 2;

    const waveSpeed = this.wrapper?.dataset.waveSpeed
      ? parseFloat(this.wrapper.dataset.waveSpeed)
      : 1;

    this.config = {
      waveNumber,
      waveSpeed,
      ...options, // Allow programmatic overrides
    };

    this.currentImage = null; // Track current image to prevent unnecessary updates
  }

  init() {
    if (!this.wrapper) {
      console.warn('Wrapper not found');
      return;
    }

    this.leftColumn = this.wrapper.querySelector('.wave-column-left');
    this.rightColumn = this.wrapper.querySelector('.wave-column-right');

    if (!this.leftColumn || !this.rightColumn) {
      console.warn('Columns not found');
      return;
    }

    this.setupAnimation();
  }
}
Why this structure?
- Flexible constructor: Accepts either a DOM element or a CSS selector
- Data attribute parsing: Allows HTML-based configuration without touching JavaScript
- Options merging: Provides programmatic override capability
- Defensive coding: Early returns prevent errors if elements are missing
Setting Up the Wave Animation
The setupAnimation method orchestrates all the moving parts:
setupAnimation() {
  // Collect all text elements from both columns
  this.leftTexts = gsap.utils.toArray(
    this.leftColumn.querySelectorAll('.animated-text')
  );
  this.rightTexts = gsap.utils.toArray(
    this.rightColumn.querySelectorAll('.animated-text')
  );

  this.thumbnail = this.wrapper.querySelector('.image-thumbnail');

  if (this.leftTexts.length === 0 || this.rightTexts.length === 0) return;

  // Create quick setters for smooth text animations
  this.leftQuickSetters = this.leftTexts.map((text) =>
    gsap.quickTo(text, 'x', { duration: 0.6, ease: 'power4.out' })
  );

  this.rightQuickSetters = this.rightTexts.map((text) =>
    gsap.quickTo(text, 'x', { duration: 0.6, ease: 'power4.out' })
  );

  // Calculate initial ranges and positions
  this.calculateRanges();
  this.setInitialPositions(this.leftTexts, this.leftRange, 1);
  this.setInitialPositions(this.rightTexts, this.rightRange, -1);

  // Setup scroll trigger
  this.setupScrollTrigger();

  // Recalculate ranges on window resize
  this.resizeHandler = () => {
    this.calculateRanges();
  };
  window.addEventListener('resize', this.resizeHandler);
}
Understanding quickTo:
GSAP’s quickTo is a performance optimization that pre-creates animation functions. Instead of calling gsap.to() repeatedly (which creates new tweens), quickTo returns a function that updates an existing tween. This is crucial for scroll-driven animations where we’re updating positions 60 times per second.
The multiplier system:
Notice the 1 and -1 multipliers passed to setInitialPositions. This creates the opposing wave motion:
- Left column:
1= positive X values (moves right) - Right column:
-1= negative X values (moves left)
Calculating Movement Ranges
Each text element needs to move horizontally within a safe range that prevents it from:
- Overlapping with the center image
- Moving outside its column boundaries
calculateRanges() {
  // Calculate ranges based on column widths minus max element width
  const maxLeftTextWidth = Math.max(
    ...this.leftTexts.map((t) => t.offsetWidth)
  );
  const maxRightTextWidth = Math.max(
    ...this.rightTexts.map((t) => t.offsetWidth)
  );

  this.leftRange = {
    minX: 0,
    maxX: this.leftColumn.offsetWidth - maxLeftTextWidth,
  };

  this.rightRange = {
    minX: 0,
    maxX: this.rightColumn.offsetWidth - maxRightTextWidth,
  };
}
Why find the widest element?
Text elements vary in width (“Tesla” vs “Mercedes-Benz”). By finding the maximum width, we ensure even the widest element stays fully visible when positioned at the extremes.
This method is called on initialization and whenever the window resizes, ensuring the animation adapts to viewport changes.
Setting Initial Positions
Before any scrolling happens, we need to position each text element according to its place in the wave cycle:
setInitialPositions(texts, range, multiplier) {
  const rangeSize = range.maxX - range.minX;

  texts.forEach((text, index) => {
    // Calculate initial phase for this element
    const initialPhase = this.config.waveNumber * index - Math.PI / 2;

    // Convert sine wave (-1 to 1) to progress (0 to 1)
    const initialWave = Math.sin(initialPhase);
    const initialProgress = (initialWave + 1) / 2;

    // Map progress to pixel position within range
    const startX = (range.minX + initialProgress * rangeSize) * multiplier;

    gsap.set(text, { x: startX });
  });
}
Breaking down the math:
- Phase calculation:
waveNumber * index - Math.PI / 2waveNumber * index: Distributes elements along the wave cycleMath.PI / 2: Offsets the starting point (starts wave at midpoint)
- Sine to progress:
(Math.sin(phase) + 1) / 2Math.sin()returns values from -1 to 1- Adding 1 gives us 0 to 2
- Dividing by 2 normalizes to 0 to 1
- Mapping to pixels:
minX + progress * rangeSize- Converts normalized progress to actual pixel values
- Multiplied by
multiplierfor directional control
Scroll Trigger Setup
We use GSAP’s ScrollTrigger to listen for scroll events and trigger our update function:
setupScrollTrigger() {
  this.scrollTrigger = ScrollTrigger.create({
    trigger: this.wrapper,
    start: 'top bottom', // When top of wrapper hits bottom of viewport
    end: 'bottom top',   // When bottom of wrapper hits top of viewport
    onUpdate: (self) => this.handleScroll(self),
  });
}
Why these trigger points?
start: 'top bottom': Animation begins as soon as the wrapper enters the viewportend: 'bottom top': Animation continues until the wrapper fully exitsonUpdate: Allow to use the progress that is called continuously as scroll progress changes
This gives us a smooth, continuous animation throughout the entire scroll range.
Handling Scroll Updates
The handleScroll method is the heart of our animation. It runs on every scroll update and orchestrates all visual changes:
handleScroll(self) {
  const globalProgress = self.progress;

  // Since left and right texts are always aligned, we only need to check one column
  const closestIndex = this.findClosestToViewportCenter();

  // Update both columns with their respective multipliers
  this.updateColumn(
    this.leftTexts,
    this.leftQuickSetters,
    this.leftRange,
    globalProgress,
    closestIndex,
    1
  );

  this.updateColumn(
    this.rightTexts,
    this.rightQuickSetters,
    this.rightRange,
    globalProgress,
    closestIndex,
    -1
  );

  // Get the focused text element for thumbnail update
  const focusedText = this.leftTexts[closestIndex];
  this.updateThumbnail(this.thumbnail, focusedText);
}
The coordination strategy:
- Calculate scroll progress: One number (0-1) drives the entire animation
- Find the focused element: Check only the left column since both columns are always horizontally aligned
- Update positions: Move all text elements in both columns according to wave formula using the same index
- Update states: Add “focused” class to centered elements in both columns
- Sync image: Update thumbnail based on the focused text element
Updating Column Positions
This method updates all text elements in a column while highlighting the focused one:
updateColumn(texts, setters, range, progress, focusedIndex, multiplier) {
  const rangeSize = range.maxX - range.minX;

  texts.forEach((text, index) => {
    // Calculate wave position for this element at current scroll progress
    const finalX = this.calculateWavePosition(
      index,
      progress,
      range.minX,
      rangeSize
    ) * multiplier;

    // Use quickTo setter for smooth animation
    setters[index](finalX);

    // Toggle focused state
    if (index === focusedIndex) {
      text.classList.add('focused');
    } else {
      text.classList.remove('focused');
    }
  });
}
Performance note:
By separating the calculation (calculateWavePosition) from the application (setters[index]()), we keep the code clean and maintainable. The quickTo setters handle the animation smoothly without creating new tweens.
The Wave Position Formula
This is where the mathematical magic happens:
calculateWavePosition(index, globalProgress, minX, range) {
  // Calculate phase: combines element index with scroll progress
  const phase =
    this.config.waveNumber * index +
    this.config.waveSpeed * globalProgress * Math.PI * 2 -
    Math.PI / 2;

  // Calculate wave value (-1 to 1)
  const wave = Math.sin(phase);

  // Convert to progress (0 to 1)
  const cycleProgress = (wave + 1) / 2;

  // Map to pixel range
  return minX + cycleProgress * range;
}
Understanding the phase calculation:
phase = waveNumber × index + waveSpeed × progress × 2π - π/2
        └─────┬─────┘       └──────────┬──────────┘   └─┬─┘
              │                         │                │
        Wave frequency        Scroll-driven        Starting
        distribution              offset            offset
waveNumber * index: Spaces elements along the wave (higher = more waves)waveSpeed * globalProgress * Math.PI * 2: Animates the wave based on scrollMath.PI / 2: Shifts the wave to start at its midpoint
Finding the Closest Element
To determine which text should be “focused,” we measure each element’s distance from the viewport center. Since both columns are always horizontally aligned, we only need to check one column:
findClosestToViewportCenter() {
  const viewportCenter = window.innerHeight / 2;
  let closestIndex = 0;
  let minDistance = Infinity;

  // Only check left column since left and right are always horizontally aligned
  this.leftTexts.forEach((text, index) => {
    const rect = text.getBoundingClientRect();
    const elementCenter = rect.top + rect.height / 2;
    const distance = Math.abs(elementCenter - viewportCenter);

    if (distance < minDistance) {
      minDistance = distance;
      closestIndex = index;
    }
  });

  return closestIndex;
}
Updating the Thumbnail
The image update logic handles both source changes and vertical positioning:
updateThumbnail(thumbnail, focusedText) {
  if (!thumbnail || !focusedText) return;

  // Get image from left column (single source of truth)
  let newImage = focusedText.dataset.image;

  // If focused text has no image, look for same index in left column
  if (!newImage) {
    const focusedIndex = this.rightTexts.indexOf(focusedText);
    if (focusedIndex !== -1 && this.leftTexts[focusedIndex]) {
      newImage = this.leftTexts[focusedIndex].dataset.image;
    }
  }

  // Only change image if different (prevents flicker)
  if (newImage && this.currentImage !== newImage) {
    this.currentImage = newImage;
    thumbnail.src = newImage;
  }

  // Position thumbnail to stay centered in viewport
  const wrapperRect = this.wrapper.getBoundingClientRect();
  const viewportCenter = window.innerHeight / 2;
  const thumbnailHeight = thumbnail.offsetHeight;
  const wrapperHeight = this.wrapper.offsetHeight;

  // Calculate ideal Y position (centered in viewport)
  const idealY = viewportCenter - wrapperRect.top - thumbnailHeight / 2;

  // Clamp to allow image to overflow wrapper to center on first/last text
  const minY = -thumbnailHeight / 2;
  const maxY = wrapperHeight - thumbnailHeight / 2;
  const clampedY = Math.max(minY, Math.min(maxY, idealY));

  // Apply position directly without animation for perfect scroll sync
  gsap.set(thumbnail, { y: clampedY });
}
Key design decisions:
- Single source strategy: Left column holds all image data. Right column references by index.
- Change detection:
currentImagetracking prevents unnecessary DOM updates - Viewport-relative positioning: Image stays centered as you scroll
- Overflow allowance:
minYandmaxYlet the image extend beyond wrapper bounds, ensuring it can center on the first and last text elements gsap.setvsgsap.to: Instant updates maintain tight scroll synchronization
Why allow overflow?
Without the overflow allowance, the image would “stick” to the wrapper’s top/bottom edges when scrolling to the very first or last text element. The negative minY and extended maxY let it move freely to maintain perfect centering.
Cleanup and Memory Management
A proper cleanup method prevents memory leaks when destroying instances:
destroy() {
  if (this.scrollTrigger) {
    this.scrollTrigger.kill();
  }
  if (this.resizeHandler) {
    window.removeEventListener('resize', this.resizeHandler);
  }
}
Always call this if you’re dynamically creating/destroying animation instances (for example, in single-page applications).
Using the Animation
With our class complete, here’s a complete initialization example in your main.js:
import gsap from 'gsap';
import { ScrollTrigger } from 'gsap/ScrollTrigger';
import { ScrollSmoother } from 'gsap/ScrollSmoother';
import { DualWaveAnimation } from './dual-wave/DualWaveAnimation.js';

// Register GSAP plugins
gsap.registerPlugin(ScrollTrigger, ScrollSmoother);

// Create smooth scroll instance (ESSENTIAL for fluid animation)
ScrollSmoother.create({
  smooth: 1.5,
  effects: true,
  normalizeScroll: true,
});

// Initialize with default settings from data attributes
const animation = new DualWaveAnimation('.dual-wave-wrapper');
animation.init();
// Or with custom options that override data attributes
const customAnimation = new DualWaveAnimation('.dual-wave-wrapper', {
  waveNumber: 8,
  waveSpeed: 0.5,
});
customAnimation.init();Remember: ScrollSmoother (or an alternative like Lenis) is crucial. Without smooth scrolling, the wave animation will appear jerky and disconnected from the scroll input.
Experimenting with Wave Settings
Now that everything is set up and we can easily tweak the wave parameters, here are a few examples of what you can get by changing the number of waves. Feel free to test things out on your own, be curious, try adjusting the layout, the number of waves, and so on.
I hope this tutorial was useful and that you enjoyed it. If you’d like to see more of my work, make sure to follow me on your favorite platforms: X, LinkedIn, Instagram, and YouTube. I share all my projects, experiments, and recreations of award-winning websites there.
Thanks for reading!